DELTARUNE Battles Enemy Tier List
Difficulty bands for Castle Town Dojo practice—built for a WIP that still changes.
Why this list uses bands, not invented names
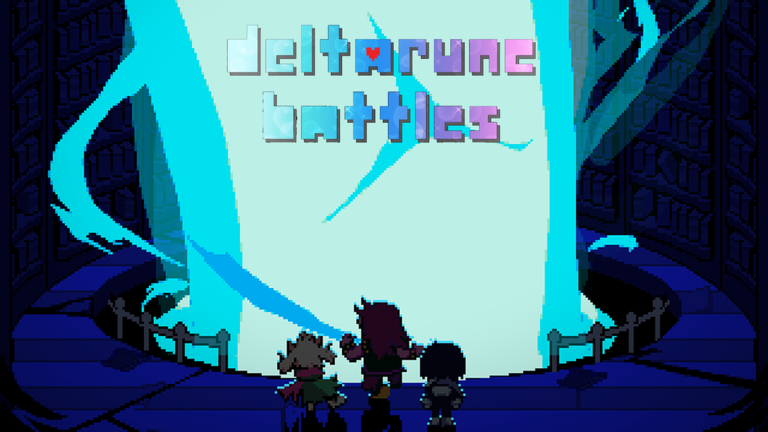
DELTARUNE Battles is an early WIP Roblox fangame by dreamysdead. Official blurbs and in-game copy talk about Dojo enemies and practice fights in Castle Town, but a public roster with stable, wiki-safe proper names is not something we can treat as fixed while the experience is still updating. This tier list therefore ranks difficulty bands—Training, Mid, and High Chaos—rather than inventing fake boss titles that would age into fiction after the next patch.
Use the bands to choose practice intensity. Pair them with Castle Town Dojo for routing, Battle Basics for the core loop, and How to Beat Dojo Enemies for pattern notes you write yourself after each attempt. Return to the Tier List Hub when you want the party-comp sibling page as well.
How we score a fight
We weigh four practical signals:
- Pattern readability — Can you describe the attack after two deaths?
- SOUL pressure — How often must you commit to a lane before the next bullet arrives?
- Menu timing stress — Does opening with C/M feel safe, or does the board punish hesitation?
- Mistake forgiveness — After one clip, can you recover, or does the pattern chain-punish?
Controls literacy sits underneath every rank. Confirm with Z/K, cancel with X/L, open menus with C/M, and move with arrows/WASD. If those binds still feel foreign, warm up on the Controls Cheatsheet and the longer Controls guide before chasing High Chaos nights.
Training band — learn the language
Training-band Dojo opponents exist to teach habits, not to inflate your highlight reel. Expect slower telegraphs, wider safe pockets, and enough downtime that you can narrate what just happened. Your goals in this band:
- Confirm and cancel without looking at the keyboard.
- Open the menu once per turn on purpose, not by panic.
- Dodge for clean lanes instead of random circling.
- Leave the Dojo knowing one rule you will reuse tomorrow.
Treat a Training fight like a lab. Five intentional resets beat one lucky clear. New players should start here after Getting Started, not after watching a chaos clip. If you still mash confirm, stay in Training until the SOUL movement from Battle Basics feels automatic.
Practice prescription: two warm-up attempts focused only on movement, then three attempts where you allow yourself one menu action per cycle. Log what clipped you. That notebook becomes more valuable than any tier letter.
Mid band — real bullet reading
Mid-band foes assume you already know the menu verbs. Telegraphs shrink. Overlaps appear. Safe pockets move. You will lose if you stare at the UI while the board is already asking for a lane decision. Mid is where most dedicated practice time should live once Training feels boring.
Signs you belong in Mid:
- You can cancel a bad menu choice before it commits.
- You survive the first thirty seconds without accidental menu opens.
- You can name the pattern that killed you last run.
Signs you should drop back to Training:
- You cannot explain a death in one sentence.
- Friends in Party Battles keep waiting while you relearn basics.
- You are tilting into rapid retries with no notes.
Mid practice pairs well with the Battle Prep Checklist. Run the checklist, pick one Mid opponent type present in your build, and stop after a fixed attempt budget. Climbing the band means consistency, not a single heroic clear under chaos.
High Chaos band — optional stress tests
High Chaos is for players who already clear Mid with composure. Expect denser bullet language, shorter decision windows, and patterns that punish greed. This band is excellent for stress inoculation and terrible as a first-night destination.
Rules of engagement:
- Enter High Chaos only after a Mid warm-up the same session.
- Agree on a stop condition (for example, five attempts or fifteen minutes).
- Prefer private or quiet sessions so voice chat does not drown the audio cues you rely on.
- Do not measure your worth by a WIP’s hardest available practice foe.
Because the game is currently updating, a High Chaos encounter can soften or spike overnight. If a fight suddenly feels alien, check Updates Hub and re-baseline in Mid before declaring yourself “washed.” Fangame difficulty is a moving target; your note-taking habit is the stable skill.
How to climb without inventing lore
You do not need a fake bestiary to improve. Use this loop:
- Pick a band from this page.
- Enter the Dojo via your usual Castle Town route (Castle Town Dojo).
- Fight one opponent type until you can teach the pattern to a friend.
- Compare your subjective rank with a buddy’s notes.
- Only then move up a band.
If your group disagrees about where a live foe sits, that disagreement is healthy. Record both opinions. After a patch, re-test one fight from each band. The Enemy Tier List (this page) should be rewritten by the community over time; the bands are scaffolding, not scripture.
What we refuse to rank on
- Promo codes — none are publicly confirmed. See Codes Hub.
- Scripts / automation — we have not found trustworthy scripts for this exact experience; skill pages beat injectors. See Scripts Hub.
- Unofficial affiliation myths — this Roblox project is not affiliated with Toby Fox. Tier names describe the fangame WIP, not official DELTARUNE chapters.
If a video promises a named “secret final Dojo god” that does not appear in your build, ignore the title and trust the place you joined from Wiki Links.
Solo lab vs party night
Solo lab sessions should bias toward Training and Mid. Party nights can sprinkle one High Chaos showcase, but only after everyone consents. Online rivalry through the party menu (2+ players) has its own ranking page: Party Comp Tier. Do not confuse “I can solo a chaos pattern” with “our group can coordinate menus fairly.”
A clean party night often starts with a Mid Dojo warm-up so everyone’s binds are awake, then moves to versus rounds. Keep the Controls Cheatsheet pinned for newcomers in voice chat.
Session templates tied to bands
Training night (20 minutes): cheatsheet glance → one Training foe → five intentional resets → write three bullets → quit while focused.
Mid grind (35 minutes): prep checklist → Mid foe → attempt budget of eight → optional second Mid type if composure remains → cool-down Training clear.
Chaos probe (25 minutes): Mid warm-up mandatory → High Chaos block with a hard stop → debrief using How to Beat Dojo Enemies structure → no “one more” spirals.
Related reading
- Tier List Hub — overview and ranking philosophy.
- Party Comp Tier — online coordination ranks.
- Guides Hub — skills behind every band.
- Tools Hub — session structure.
- Updates Hub — WIP change context.
Rank the pressure, not imaginary names. Read the pattern, write the note, then earn the next band inside the Dojo.
Frequently Asked Questions
Quick answers for Dojo practice, party fights, and WIP updates.
Why are there no named enemy tiers?
The experience is an early WIP and we refuse to invent roster names. Use Training, Mid, and High Chaos bands, then label foes yourself from live Dojo practice.
Which band should beginners start in?
Start in Training after Getting Started, then move to Mid once you can explain deaths and control menus under light pressure.
Do codes or scripts change enemy tiers?
No. There are no confirmed promo codes, and we are not listing scripts for this exact game. Rankings assume honest play.
Where do I put pattern notes?
Use How to Beat Dojo Enemies as your note framework and re-check bands after updates. For boss-level pressure, see Boss Tier List and Roaring Knight Guide.